How to Clean Your Dog’s Ears at Home
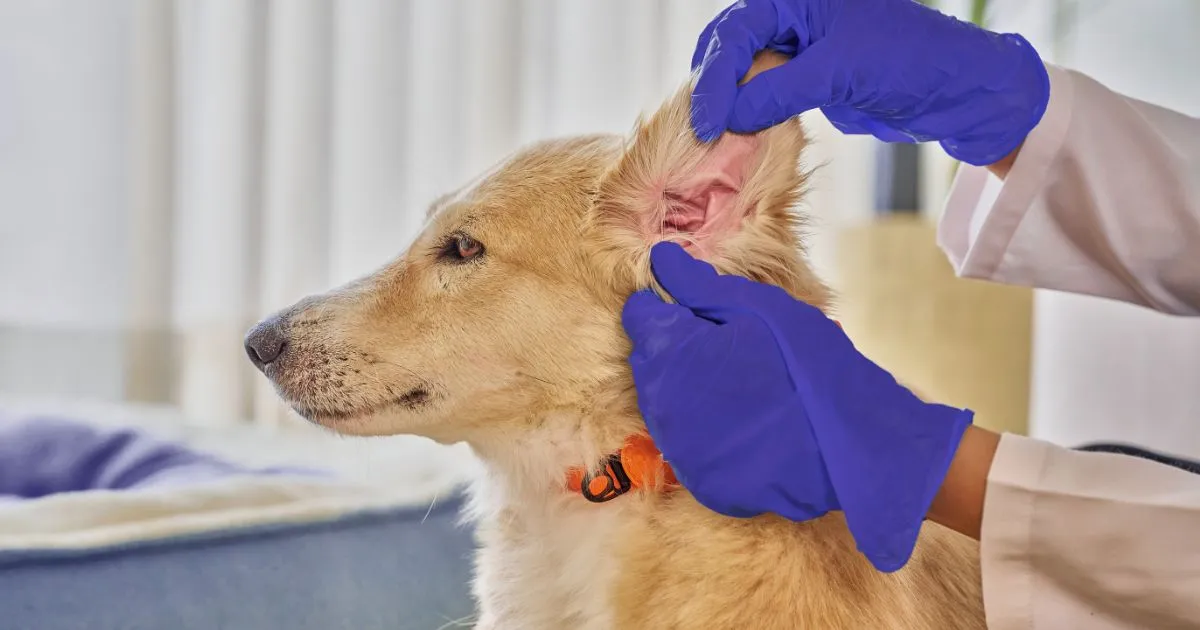
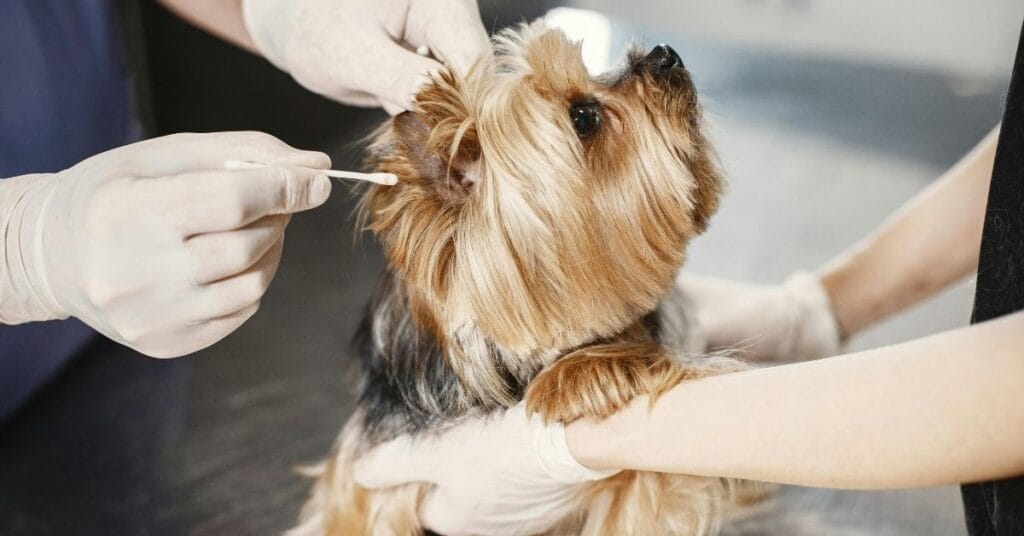
Clean your dog’s ears at home may feel overwhelming at first, but with a consistent routine, it becomes a simple part of pet care. Start by preparing what you’ll need: an ear cleaning solution approved by your vet, cotton balls, and some treats for encouragement. Never use cotton swabs, as they can force dirt deeper into the ear. Instead, dampen a cotton ball with the solution and gently clean the visible areas of the ear, including all the folds.
Dog’s Ear Anatomy
Understanding your dog’s anatomy is essential for effective grooming, especially when it comes to ear cleaning. Familiarizing yourself with this can aid in avoiding harm and enhancing your cleaning techniques. The structure of a dog’s ear is quite intricate.
The outermost part is known as the pinna, which can be either upright or floppy. Dogs with floppy ears may experience reduced airflow to the ear canal, potentially increasing their risk of ear infections.
Just beyond the visible opening is the external canal, which descends vertically along the side of the head before turning inward horizontally. This canal features skin over cartilage, resulting in ridged surfaces. Additionally, it houses glands that produce wax and oils (sebum) for ear health.
At the end of the external canal lies the eardrum, or tympanic membrane — an essential tissue that vibrates in response to sound, playing a critical role in hearing while also safeguarding the middle and inner ear.
Located beyond the eardrum are the middle and inner ear, which contain delicate components vital for hearing and balance. Damage to these areas can severely impact a dog’s auditory and equilibrium abilities, with some effects being irreversible. Keeping this anatomy in mind can help ensure you properly clean your dog’s ears with safe and effective techniques.
How to Prepare to Clean Your Dog’s Ears at Home
The ideal locations to clean your dog’s ears safely are either in the bathtub or outdoors. This activity works particularly well just prior to giving your dog a bath. Remember that when your dog shakes its head, any debris and cleaning solution can end up on you and your walls, so take precautions. You might want to wrap your dog in a towel or place one underneath to keep the area tidy. Additionally, having a towel handy for yourself can help keep you dry.
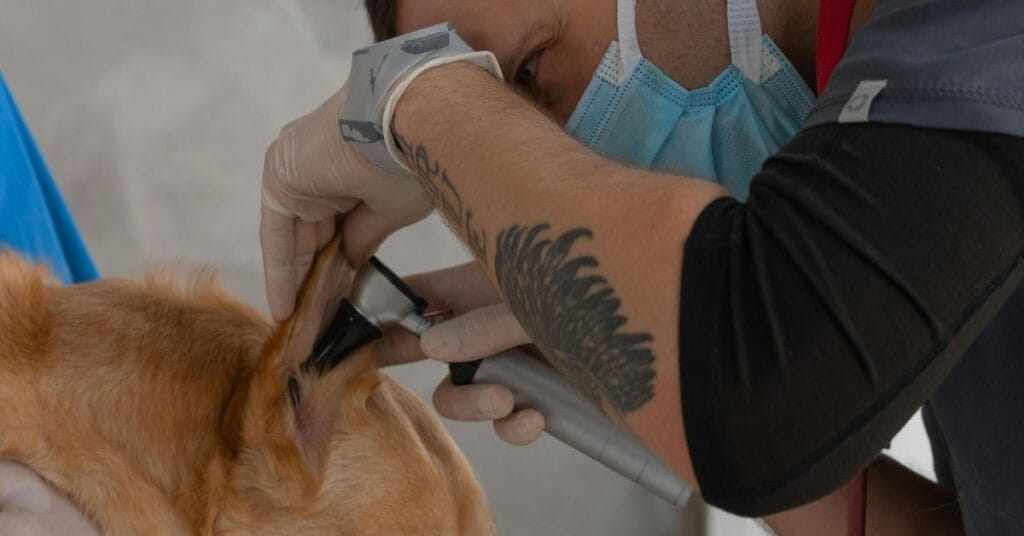
Before you begin cleaning your dog’s ears, it’s important to inspect them first. This examination will give you an idea of the level of dirtiness and allow you to assess if there’s an excess of hair present. If you find that your dog has a significant amount of hair in the ear canal, you may need to pluck it. This can be done using your fingers, tweezers, or hemostats. Using a specialized dog ear powder can assist in gripping the hair effectively. For guidance on how to safely pluck your dog’s ears without causing discomfort, consult your groomer or veterinarian.
Things You Need
When it comes to cleaning your dog’s ears, it’s important to steer clear of products that include alcohol or hydrogen peroxide, as these ingredients may irritate your pet’s sensitive skin.
Instead, consider using veterinarian-approved ear cleaning solutions like Epi-Otic by Virbac. You will also need some cotton balls, pads, or gauze squares for application.
If your dog has dense fur in their ear canals, tweezers or hemostats can help manage the hair effectively. Lastly, keep a couple of towels handy for cleanup during the process.
Apply the Ear Cleaner
To start the process of cleaning your dog’s ears, lift the ear flap and apply a few drops of ear cleaner to the interior of the flap near the ear opening. Then, carefully insert the tip of the bottle into the ear and apply gentle pressure to dispense the cleaner.
Massage Your Dog’s Ear
To effectively clean your dog’s ears, start by gently massaging the area at the base of the ear, which is located near the jaw where you can feel the cartilage. This action should create a noticeable smacking sound.
This massage aids in allowing the cleaning solution to reach the canal’s ridges and helps dislodge any debris present. Continue massaging for several seconds — longer if the ears are particularly dirty — then release, giving your dog the opportunity to shake its head. It may be wise to turn away or hold a towel in preparation for this step.
Step-by-Step Guide to Clean the Ear Canal Safely
To clean your dog’s ears effectively, allow your dog to shake its head first. Next, take some cotton or gauze and moisten it lightly with an ear cleaner. Using your finger, gently wipe the inside of the ear canal. You can insert your finger into the canal as far as it comfortably goes without applying force.
If you notice the ear still seems dirty, you can repeat the cleaning process. However, if you observe any redness, bleeding, or signs of discomfort from your dog, stop immediately.
Proceed to clean the other ear using the same method. Once both ears are addressed, be sure to clean away any visible debris and dry your dog’s head. Finally, don’t forget to reward your dog with a treat and offer plenty of praise for good behavior during the cleaning process.
Common Problems and How to Handle Them
Cleaning your dog’s ears is essential, but certain practices can lead to issues. A frequent error is using cotton-tipped applicators within the ear canal, as this might push debris further in and potentially harm the eardrum. When using an ear cleaning solution, exercise caution: don’t insert the tip deeper than what’s visible, and avoid applying excessive pressure.
Maintaining a regular ear cleaning routine is crucial in preventing infections. An effective ear cleaner not only helps remove wax and debris but also keeps the ears dry. Excess moisture can lead to bacterial and yeast infections, so ensuring the ears stay clean and dry is vital.
It’s important to note that each dog has unique ear cleaning requirements. Some dogs might need minimal cleaning, while others, especially those with floppy ears, may require weekly attention. Regularly inspect your dog’s ears and discuss with your veterinarian how often they should be cleaned. Keep in mind that cleaning too frequently can cause irritation, just as neglecting ear care can lead to buildup.
For more dog care tips, read our Cavachon Dog Breed: Complete Care Guide
FAQs About How to Clean Your Dog’s Ears at Home
It’s generally recommended to clean your dog’s ears once a month, but this can vary based on the breed and individual needs.
It’s generally recommended to clean your dog’s ears once a month, but this can vary based on the breed and individual needs.
You will need cotton balls or pads, a veterinarian-approved ear cleaning solution, and treats for positive reinforcement.
While some home remedies exist, it’s best to use products recommended by your veterinarian to ensure safety and effectiveness.
When done gently and with the right supplies, ear cleaning should not be painful. Always watch for signs of discomfort.
Gently lift the ear flap, apply the cleaning solution according to instructions, massage the base for a few seconds, and then wipe with a cotton ball.
If you notice excessive dirt or signs of infection, consult your veterinarian before cleaning to avoid exacerbating the problem.
Yes, ear cleaning can be done at home, but it’s essential to follow proper techniques and consult your veterinarian for guidance.